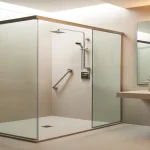
Installing a grab bar in a fiberglass shower may feel intimidating, but it’s one of the most effective ways to make bathing safer for seniors. A properly secured grab bar provides stability, reduces fall risk, and helps older adults maintain independence in the bathroom.
The challenge is that fiberglass walls aren’t as sturdy as tile or drywall, so you can’t just screw into them directly.
The good news is that with the right tools, anchors, and careful steps, you can safely install a grab bar that will hold strong. This guide walks you through exactly how to do it.
Quick Rundown: Installing Grab Bars in Fiberglass Showers for Safer Bathing
- Why It Matters: Grab bars prevent slips, reduce fall risks, and support independence in the bathroom.
- Special Challenge: Fiberglass walls are delicate and require reinforcement, never screw directly into them.
- Tools You’ll Need: Drill, level, stud finder, saw, 2×4 lumber, Torx screws, tape measure, and safety gear.
- Installation Process: Cut drywall behind the shower, add 2×4 reinforcement, drill carefully, and secure the grab bar with strong screws.
- Finishing Touches: Patch and paint the wall, seal holes with caulk if needed, and test the bar for strength.
- Extra Tip: Stainless steel, textured-grip bars are safest; consult a pro if you’re unsure about DIY installation.
So, let’s talk about the tools and materials that you need for installing grab bars in fiberglass showers.

Tools and Materials For This Project
Let’s first talk about the tools that are needed for this project.
- Drill – A power drill with appropriate drill bits for fiberglass and wood.
- Tape Measure – To measure the correct placement of the grab bar and reinforcement.
- Level – Ensures the grab bar is straight and aligned properly.
- Stud Finder – To locate wall studs if the shower backs up to a wall without exposed framing.
- Reciprocating Saw or Oscillating Tool – For cutting out sections of drywall to install the 2×4 reinforcement.
- Screwdriver (Manual or Electric) – Torx head screwdrivers or bits for securing the grab bar.
- Pencil or Marker – To mark the drilling locations on the fiberglass.
- Masking or Painter’s Tape – Applied to the fiberglass surface to prevent cracking or splintering while drilling.
- Safety Glasses – To protect your eyes while cutting and drilling.
- Dust Mask – To avoid inhaling fiberglass or drywall dust during the project.
- Caulking Gun (Optional) – For applying waterproof caulk around the grab bar holes to prevent water seepage.
- Patch Kit and Paint Supplies – For repairing and painting the drywall after the reinforcement is installed.
Materials needed for the project.
- Grab Bar – A sturdy, rust-resistant grab bar that meets your needs.
- 2 x 4 Lumber – For reinforcement behind the fiberglass shower.
- Torx Head Screws or Lag Bolts – Strong, corrosion-resistant screws for securing the grab bar.
- Anchors (if needed) – Heavy-duty wall anchors if attaching the grab bar to a non-stud area (though not recommended for maximum safety).
- Waterproof Caulk (Optional) – For sealing the drilled holes in the fiberglass.
- Drywall Patch Kit – To repair the wall after the reinforcement installation.
- Paint – To match the color of the existing drywall after patching.
With these tools and materials, you’ll be well-prepared to follow the steps demonstrated in the video for installing a grab bar in a fiberglass shower.
About The Video Demonstrating The Process
The video takes you through the entire process of installing a grab bar in a delicate fiberglass shower.
Here’s what you’ll learn:
Reinforcement Installation
- Removing a section of drywall from the hallway side.
- Adding a sturdy 2×4 for reinforcement, ensuring the grab bar is securely anchored.
Drilling and Securing the Grab Bar
- Drilling holes through the fiberglass into the installed 2×4 without damaging the shower.
- Using durable Torx head screws to ensure a firm and long-lasting hold.
Adding a Functional Shower Accessory
- Attaching an adjustable shower range to the grab bar, allowing users to easily switch between showerheads and adjust their height.
Finishing Touches
- Patching and painting the wall to restore its appearance while ensuring the grab bar blends seamlessly into your shower area.
Additional Tips for Grab Bar Installation in Fiberglass Showers
While the video is detailed, here are some extra considerations to enhance your understanding:
Choosing the Right Grab Bar
- Opt for stainless steel grab bars for durability and rust resistance.
- Ensure the grab bar has a textured grip for added safety.
Professional Assistance
- If you’re unsure about your DIY skills, consult a professional contractor or handyman experienced in aging-in-place modifications.
Safety First
- Check the weight capacity of the installed grab bar to ensure it can support the user securely.
- Always test the grab bar by pulling on it firmly after installation.
Positioning the Grab Bar
- Place the grab bar at a comfortable height based on the user’s needs. A horizontal bar near the shower entrance and a vertical bar near the controls are common configurations.
Alternative Solutions for Delicate Materials
- If drilling into fiberglass feels risky, consider no-drill grab bar options with industrial-strength adhesive, but remember these may not provide the same level of security.
Why This Matters
A properly installed grab bar can make a huge difference in preventing slips and falls, giving older adults greater independence and peace of mind while aging in place. This video offers a practical demonstration that you can follow to make your shower safer and more user-friendly.
Watch the Video
If you’re ready to see these steps in action, click here to watch the video. It’s a great resource for caregivers and older adults alike.